|
|
About SCEC | Research | Resources | Learn & Prepare |
|
Stereoscopic Camera Hardware
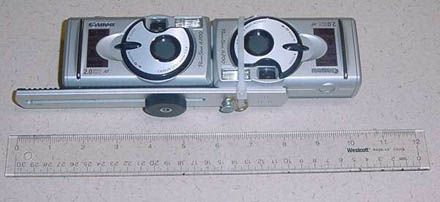
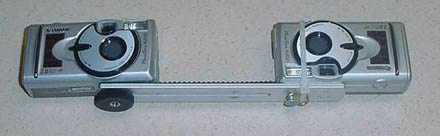
Taking 3D images may be easier, and cheaper than you think. Again, the concept is really simple. You need to record the same thing that your eyes see. In theory, you could use one camera to take two pictures from slightly different angles. We actually did this successfully, although it is a challenge to keep the camera at the same height and keep your subject still (if it's alive). A more appealing solution is to mount two digital cameras together so that their lenses are a few inches apart, and facing the same direction. We chose the Canon PowerShot A200, a relatively cheap camera ($200) because we were interested in putting together a functional system as cheaply as we could. Although we were instructed to use two replicas of the same color in order to control for differences in color recording and output, our cameras often produced different quality images (different hues, colors and contrasts) even though they were the same model. This was probably a side-effect of the fact that they are cheap cameras, but it proved unproblematic for our purposes, since the differences weren't too severe, and our eyes were able to do the necessary adjusting for us (go brains!!). If we were looking for more professional quality photos, we may have needed to invest in better cameras. Two recommendations to consider: Our cameras run on AA batteries. For work in the field, this is ideal since you can stock up on batteries, and may not have a power-outlet available for recharging. If you will always have access to an electrical outlet, we recommend rechargeable batteries. They last longer and in the long run save money. It is also important that you select a camera that has upgradeable memory. This will allow you to take many pictures without needing to upload them to a computer to purge the camera's memory. We use two 64MB Flash Memory cards. Our camera's tripod mounting hole made it very easy to mount the two cameras together. To do this, we used a flash mount ($16) that we purchased at a photography store. The mount has a slot across which a screw slides back and forth. We mounted one camera upside down in order to minimize the distance between the lenses. One of the camera's is fixed permanently in place, while the other can slide in and out through the groove.
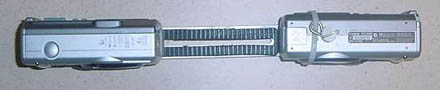
When attaching your camera's it is important to make sure that you have access to all of the input/output plugs, as well as all the menu buttons.
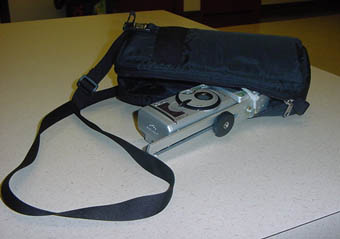
In order to take simultaneous pictures with our camera, both shutters must be held down at the same time. This often yields a delay of anywhere from a fraction of a second to a few seconds. If the subject matter is holding still, this delay isn't an issue, but our camera would have trouble recording fast action. For more expensive cameras there is hardware which will activate both shutters at the same exact time. We found that when the auto-flash option was turned on, the cameras would sometimes detect different lighting and only one of the cameras would use a flash. When this happened, the resulting studio pair was ruined because one image had a strong light-source and the other didn't. This problem was solved by turning off the auto-flash. If our shutters were simultaneous, this wouldn't be a problem. We also found a very nice carrying case which fits the setup almost like a glove. This made carrying the camera around in the field much easier. |
||||
|
Created in the SCEC |
|
© 2025 Privacy Policy and Accessibility Policy |