|
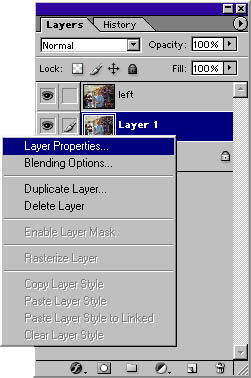
Making Geowall Images in Adobe Photoshop In order to make a Geowall image you need two slightly off-set images. These can be produced using 3D software applications (Bryce, 3D Studio Max) or they can downloaded from a camera or pair of cameras. If you are downloading images from cameras, it is absolutely critical that you keep track of which image is for the left eye and which is for the right eye. You can figure this out later, but it is a very tedious process and prone to error. I recommend placing all left-eye images in one folder (called Left) and all the right-eye images in another folder (called Right). If you are using cameras it is likely that the image file names don't sync up properly - the left-right pairs have different, unrelated file-names. If you are working with a large number of images, it's worth your time right now to go through and rename all of the images so that you can tell which pairs go together. I recommend a naming system that goes something like this: 01l, 01r, 02l, 02r... and so on where the number indicates the images go together as a pair and the r/l indicates which eye the image is. This system is good because it lets you put all the images into a single folder without the order getting confused. Now that you have that done, it's time to start working in Adobe Photoshop. For this demo, I'll be using version 7.0. The first thing you need to do is open the left and right images. Once those are opened, you want to copy them into a new document. In the first image go to Select > All (Control-A), then Edit > Copy (Control-C). Now go to File > New (Control-N). The new file will default to the correct dimensions, so hit enter, and finally go to Edit > Paste (Control-V). Your image will be pasted as a new layer. You want to label that layer left or right, so right click on the layer and go to Layer Properties, and type "Left" or "Right" depending on which layer it is.
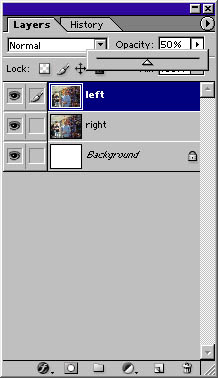
Repeat these steps for the second image. You should now have a 3-layer image, with layers "left", "right" and "background." Now you need to align the layers properly. to do this, go to the top layer and select the Opacity drop-down menu. Slide the bar until it reads around 50%.
You should now be able to see both images at
the same time, as the top image is slightly transparent. You must
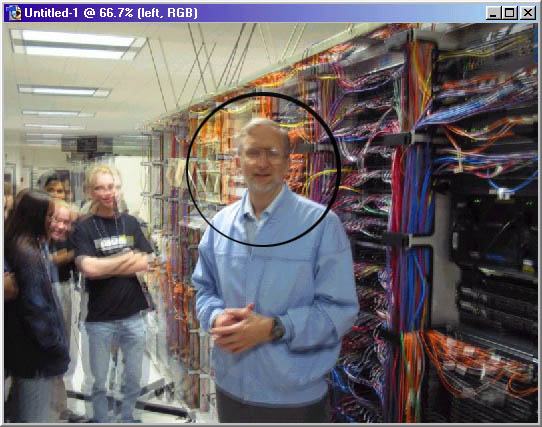
pick a prominent place on the image which will be your focus. This should
be somewhere near the center of the picture and where you think the eye will
be drawn to first. In this case, I'm using the head of the man. You
want to use your drag tool:
You don't want any parts of the image to have
information from only one picture, because that hurts the eyes and messes up the
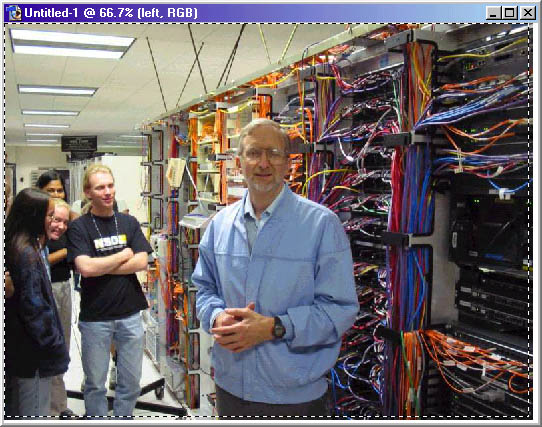
symmetry. So the next step is to return the top layer to 100% Opacity.
Now deselect the eye next to the layer for the bottom image layer
Now go to Edit > Crop. This will resize your image so that both eyes take up the entire field. Now it is time to separate your left and
right image. Make the bottom layer visible again by clicking on the eye
icon next to the layer.
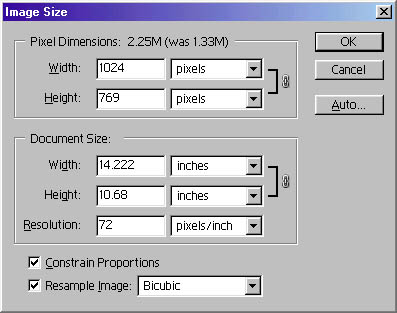
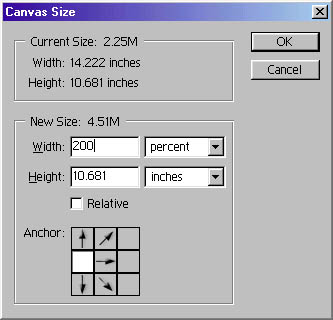
Now you have to double the canvas width so that you have somewhere to drag the second right-eye layer. It is helpful (although not necessary) if your background color is set to white. Select Image > Canvas Size. In the Width box, type 200. Change the "pixels" dropdown menu to percent and then select the left-middle box below so that the expansion will be to the right. Click OK.
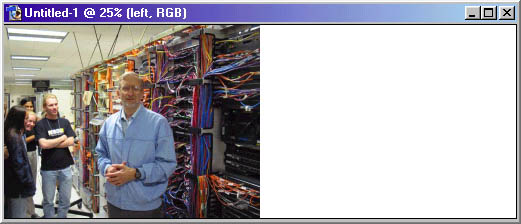
The resulting image should look like this:
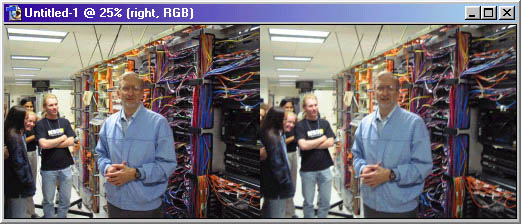
Now select the right-eye image in the layers
bar and using the drag tool
You are ready to save the image now. Go to File > Save As... (Control-Shift-S) and save it as a jpg or tiff, or whatever file format you want. Voila! A Geowall stereo pair.
To view it, just look at it in full screen mode in any image browser including Internet Explorer. |