|
The Stacker
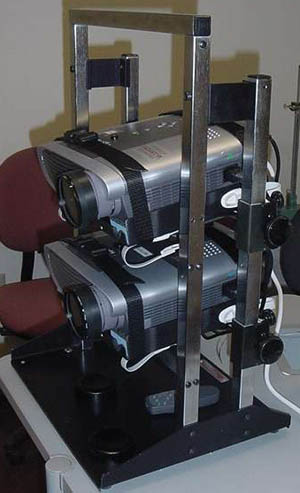
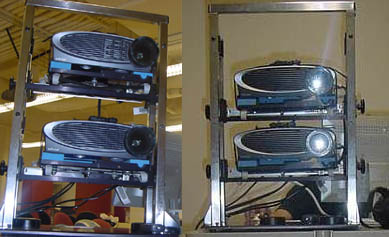
For our Geowall, the stacker needed the most customization. This may be because we ordered a used stacker from Audio Vision, Inc. which wasn't designed for the InFocus projectors we were using (it was made for slide-projectors). We got our Chief MSU-2 Projector Stacker used for $250; about half what it would have cost new. The stacker is an important element for the Geowall. It must hold the projectors close enough together to minimize the distortion caused by key-stoning, but far enough apart so that both projectors can breath to avoid overheating. It must also allow small adjustments to be made on all three axis of the projector's orientation. With a series of pre-existing knobs, and one or two customizations, we were able to make our MSU-2 fit the bill. The first thing we had to do was attach the stacker to the cart. This was relatively simple, since the stacker is made to be attached to things. There are four holes in the stacker, and it was merely a matter of drilling four holes into the cart-top, and then fixing the stacker with screws, washers and nuts.
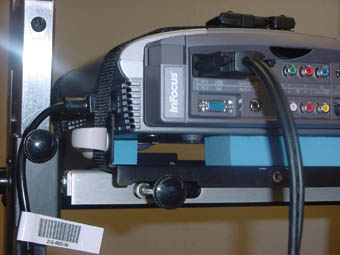
Once attached we had to deal with the stacker trays, which hold the projectors. The trays had side walls which blocked the power cord on the side of the projectors. This prevented them from sitting flush. We had two options. Either we could cut the steel sides off or we could figure out a way to elevate the projector. The steel was pretty thick, making the first option more difficult. Additionally, if done properly, elevating the projectors could help to ventilate them by allowing air between the tray and the projector. Using six dry-erase board erasers, three for each tray, we were able to construct a lift. The erasers worked perfectly because they were light-weight and firm. They also had nice pads on which the projector could rest. We used strong double sided tape to fix the erasers to the board.
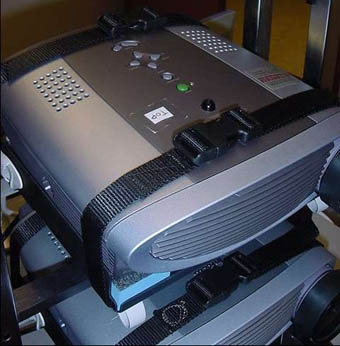
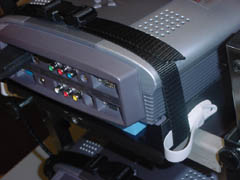
Now we had to find a way to firmly hold the projectors in place. To solve this, we made four nylon cords with plastic buckles. These were attached to the tray using 3M Command-Strip rubber cord holders, and tightened in place to hold the projectors fast.
The final customization we made was to lower the top tray so that the two projectors would be close together. The closer the projectors are to each other the more closely the two projected images can align. This was a simple matter of drilling a few new holes and repositioning one crucial pivot-bar. Most of the tray's attachments are designed to slide up and down the posts, so the moving it was not arduous.
The stacker is of course bolted to the cart. This makes it difficult to travel with, which isn't really a major problem since it's bulkiness was already a liability. When traveling, the stacker can be replaced by four door-stops, which can be wedged between the projectors in such a way as to ensure they are pointing in the correct direction. |